
I.SYSTEM OVERVIEW
This document accompanies the project report and provides practical instructions for setting up, running, and maintaining the predictive motor health monitoring system. It is intended for someone reproducing the demo, performing follow-on work, or evaluating the project.
1.1 Architecture in One Picture

The Tiva-C samples the IMU and current sensor every 500 ms, formats the values as a JSON line, and sends it out the same USB cable used for flashing. Python on the laptop reads the stream, optionally logs it for training, and runs an Isolation Forest model on each window of four samples.
1.2 What Was Built vs Skipped
- BUILT: Phases 1–3 (motor control, MPU6050, ACS712) and Phase 5 (host-side AI pipeline).
- SKIPPED: Phase 4 (ESP8266 WiFi bridge / MQTT broker) — replaced by direct USB-serial transport.
REASON: NodeMCU UART receive issues during testing; the system architecture was decoupled to allow this skip without losing functionality. The data-source layer in the Python code is transport-agnostic, so the WiFi bridge can be added later without changing any other code.
II.BILL OF MATERIALS
The complete component list is given below. All parts are commodity components widely available from electronics distributors.
| Component | Qty | Notes / specifications |
| TI Tiva-C LaunchPad (EK-TM4C123GXL) | 1 | TM4C123GH6PM, ARM Cortex-M4F @ 80 MHz, 256KB flash, 32KB SRAM |
| L298N H-bridge module | 1 | Dual H-bridge; one bridge used. Capable of 2 A continuous per channel. |
| Brushed DC motor (12 V) | 1 | Small geared DC motor with exposed shaft for fault simulation. |
| MPU6050 module (GY-521) | 1 | 3-axis accel + 3-axis gyro, I²C address 0x68, 3.3 V supply. |
| ACS712-20A current sensor module | 1 | Hall-effect, 5 V supply, 100 mV/A sensitivity, ±20 A range. |
| Resistor 10 kΩ 1% | 1 | Series element of voltage divider. |
| Resistor 20 kΩ 1% | 1 | Shunt element of voltage divider. |
| Bench power supply or 12 V wall adapter | 1 | Motor supply only. Tiva and sensors powered from USB. |
| Breadboard, jumper wires, USB cable | As req. | Standard prototyping supplies. |
III.WIRING REFERENCE
Connect the components according to the table below. Verify with a multimeter for continuity before applying power.
3.1 Tiva-C ↔ L298N (motor driver)
| Tiva pin | L298N pin | Function |
| PB6 | ENA | PWM enable (10 kHz) |
| PB4 | IN1 | Direction control bit 1 |
| PB5 | IN2 | Direction control bit 2 |
| GND | GND | Common ground (CRITICAL) |
3.2 Tiva-C ↔ MPU6050
| Tiva pin | MPU6050 pin | Function |
| 3.3 V | VCC | Power |
| GND | GND | Ground |
| PB2 | SCL | I²C0 clock |
| PB3 | SDA | I²C0 data |
3.3 ACS712 → Voltage Divider → Tiva ADC
The ACS712 outputs 0–5 V; the Tiva ADC tolerates only 0–3.3 V. A 2:1 resistive divider scales the output.
 Power the ACS712 from 5 V (Tiva VBUS pin or external 5 V). Wire the motor supply current through the ACS712’s IP+ and IP- screw terminals — current flows IN through IP+ and OUT through IP-. Mount the IMU on the motor casing using double-sided tape so it picks up vibration.
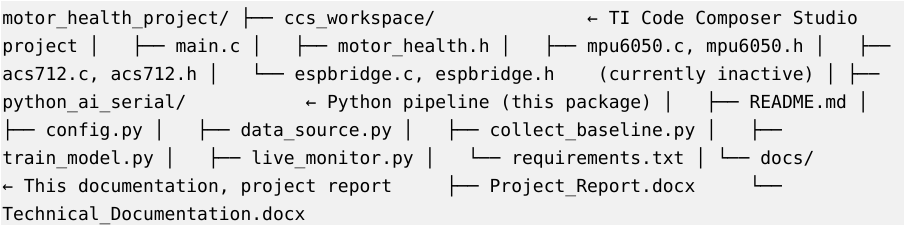
IV. FOLDER STRUCTURE
Organize the project on your laptop as follows:
V.SETUP PROCEDURE
5.1 One-Time Software Setup
- Install TI Code Composer Studio (CCS) version 12.x or later. Add TivaWare 2.2.0.295 to the project’s include path.
- Install Python 3.10 or newer from python.org. On Windows, check “Add Python to PATH” during installation.
- Open Command Prompt and verify: python –version should report 3.10.x or later.
5.2 Embedded Firmware
- Open the CCS project containing main.c and the per-driver source files.
- Build the project. The output should be approximately 24 KB of flash.
- Connect the Tiva LaunchPad via the USB debug port.
- Flash the firmware via CCS’s Debug → Run, or using uniflash.
- After reset, the LaunchPad transmits a boot banner followed by JSON telemetry lines at 2 Hz over the USB virtual COM port.
5.3 Identifying the COM Port (Windows)
- Plug the Tiva LaunchPad into the laptop via USB.
- Open Device Manager (Win+X → Device Manager).
- Expand “Ports (COM & LPT)”.
- Look for “Stellaris Virtual Serial Port (COMx)” or “Tiva Virtual COM Port (COMx)”. Note the COMx number.
- If no port appears, install the Tiva ICDI USB drivers from ti.com (search “Tiva ICDI driver”).
5.4 Python Environment
- Open Command Prompt in the python_ai_serial folder.
- Create a virtual environment: python -m venv venv
- Activate it: venv\Scripts\activate.bat
- Install dependencies: pip install -r requirements.txt
- Verify with pip list — should show pyserial, numpy, pandas, scikit-learn, matplotlib, joblib.
5.5 Configuration
Open config.py in any text editor. Change the SERIAL_PORT line to match your Tiva COM port:
SERIAL_PORT = “COM6” # ← change to your actual COM port
Save and close the file. No other changes are needed initially.
VI.OPERATION
6.1 Critical Pre-Flight Check
BEFORE running any Python script, close the CCS terminal/console window. Only one application can hold a serial port at a time. If CCS is connected to the Tiva via its terminal viewer, Python will fail with “Could not open COM6”. If you need CCS open for code editing, that’s fine — only the embedded terminal connection conflicts.
6.2 Step-by-Step Demonstration
STEP 1: Smoke test (1 minute)
python collect_baseline.py
Within a few seconds, you should see [REC] Sample N: t=15 spd=50 … lines. Press Ctrl+C to stop. This proves the data path is working.
STEP 2: Real baseline collection (5 minutes)
Run collect_baseline.py again. While it runs, cycle through speeds and direction using the Tiva on-board buttons:
| Time | Action | Buttons |
| 0:00 – 1:00 | Speed 25%, FORWARD | (default at boot) |
| 1:00 – 2:00 | Speed 50%, FORWARD | Press SW1 |
| 2:00 – 3:00 | Speed 75%, FORWARD | Press SW1 |
| 3:00 – 4:00 | Speed 100%, FORWARD | Press SW1 |
| 4:00 – 5:00 | Speed 50%, REVERSE | Press SW2 (reverse), SW1 (50%) |
Press Ctrl+C to stop. Verify the report at the end shows 600+ samples logged.
STEP 3: Train the model (5 seconds)
python train_model.py
This produces model.pkl, scaler.pkl, feature_names.pkl, and baseline_features.png. The PNG is a useful visual to show during the demo presentation.
STEP 4: Live demo
python live_monitor.py
[OK] lines stream during normal operation. To trigger an alert, gently pinch the motor shaft through a cloth — the score will drop into the negative range, [!!] flags appear, and after three consecutive abnormal windows, the [ALERT] banner is printed with the top deviating features.
6.3 Other Fault Scenarios
- Bang on the breadboard with a closed fist — vibration spike.
- Wrap a small cloth around the shaft so the motor must push through it — sustained current rise.
- Hold the motor casing (not the shaft) — different vibration pattern; may or may not trigger depending on intensity.
VII. TUNING
Three parameters in config.py control the trade-off between sensitivity and false-alarm rate.
| Parameter | Default | Effect |
| ALERT_THRESHOLD | -0.10 | More negative = stricter (fewer alerts). Try -0.05 to be more sensitive, -0.20 for less. |
| ALERT_CONSECUTIVE | 3 | Higher = needs sustained anomaly. 1 = instant alert, 5 = very few false alarms. |
| WINDOW_SAMPLES | 4 | Bigger = smoother features but slower response. 2 = fast, 10 = very smooth. |
| CONTAMINATION | 0.05 | Lower = stricter model boundary. Re-run train_model.py after changing. |
After changing CONTAMINATION or WINDOW_SAMPLES, re-run train_model.py. After changing ALERT_THRESHOLD or ALERT_CONSECUTIVE, just re-run live_monitor.py — no retraining needed.
VIII. TROUBLESHOOTING
| Symptom | Diagnosis and fix |
| Could not open COM6: Permission denied | CCS terminal is connected to the Tiva. Close the CCS console window. Only one app can hold a serial port. |
| Could not open COM6: File not found | Wrong port number, or Tiva not plugged in. Check Device Manager → Ports. Update SERIAL_PORT in config.py. |
| Many [SKIP] lines, no Sample lines | Tiva is printing debug only, not telemetry. Verify Telemetry_Send() is called in main loop. Reflash if needed. |
| Garbled characters | Baud rate mismatch. Verify Tiva UART0 int = 115200. config.py defaults to 115200. |
| train_model.py: Need at least 50 running samples | Baseline too short. Re-run collect_baseline.py for a longer period with motor running. |
| [OK] lines work, anomalies never fire | Threshold too loose. Set ALERT_THRESHOLD = -0.05. Or simulate a stronger fault (pinch harder). |
| Constant [!!] even on healthy motor | Threshold too tight, OR baseline collected at fewer speeds than current operation. Set ALERT_THRESHOLD = -0.20, or re-collect baseline varying all demo speeds. |
| Current readings drift / wrong sign | ACS712 calibration ran while motor was drawing current. Reset Tiva with motor disconnected, let calibration complete, then reconnect. |
| MPU6050 reads all zeros / never changes | I²C wiring: SDA/SCL swapped, or no pull-up on lines (most modules have built-in pull-ups; if your module doesn’t, add 4.7 kΩ to 3.3 V). |
IX. FUTURE RESTORATION OF WIFI BRIDGE
If the ESP8266 NodeMCU bridge is restored in future work, only one file in the Python pipeline needs to change: data_source.py. The contract of iter_telemetry() — yields parsed JSON dictionaries one at a time — remains identical. The internals are simply replaced with a paho-mqtt subscribe loop.
Required changes to switch back to MQTT mode:
- Add paho-mqtt to requirements.txt and run pip install.
- Add MQTT_BROKER, MQTT_PORT, MQTT_TOPIC settings to config.py.
- In data_source.py, replace the iter_telemetry() body with a paho.mqtt.Client subscribe loop that yields json.loads(msg.payload) for each message received.
- py, train_model.py, and live_monitor.py require no modifications.
This decoupling is a deliberate architectural choice and the principal value of having abstracted the data source. It demonstrates good software engineering practice — the ML pipeline does not know or care how the data arrives.
X. QUICK REFERENCE CARD
Print this page and keep it next to the demo setup.
Demo Procedure
- Plug Tiva via USB. Power motor supply. Close CCS console.
- Open Command Prompt in python_ai_serial folder.
- Activate venv: venv\Scripts\activate.bat
- (If model.pkl already exists, skip to step 6)
- Collect baseline: python collect_baseline.py — 5 min, vary speeds. Ctrl+C.
- Train: python train_model.py — 5 seconds.
- Live demo: python live_monitor.py — wait for [OK] stream, then pinch shaft.
During the Demo
- Talking point 1: Tiva reads MPU6050 (I²C) and ACS712 (ADC), runs PWM motor.
- Talking point 2: JSON telemetry at 2 Hz over USB UART.
- Talking point 3: Isolation Forest learns healthy operating envelope.
- Talking point 4: When I pinch the shaft, current and vibration spike — model catches it in ~6 seconds.
- Talking point 5: It tells you which features deviated, with z-scores. Explainable AI, not a black box.
If Things Break Mid-Demo
- Constant [!!]: edit config.py, set ALERT_THRESHOLD = -0.20, restart live_monitor.py.
- No [!!] when pinching: set ALERT_THRESHOLD = -0.05, restart live_monitor.py.
- “Could not open COM”: close CCS console, retry.
- Tiva unresponsive: unplug, replug USB, wait 5 seconds, retry.
Recent Comments