
| Threads | Interrupt | Semaphore | Mutex | Queues | Drivers |
| Template | Assign1 | Assign2 | Assign3 | Assign4 | Assign5 |
atomthread template Project
atomthread template Project
► Install Code Composer Studio
► Install TivaWare for C Series
► Launch Code Composer Studio with new workspce.
► Instead of creating a new project, we will Import a pre-configured project from the file system.
► Download atomthreads Template Project.
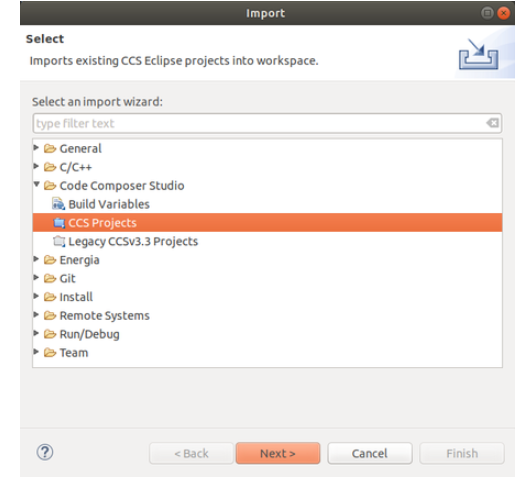
► To import an existing project into the CCS IDE workspace, select File > Import from the CCS main menu.
► In the Next screen, Select Code Composer Studio > CCS Projects
► Click on the Next button.
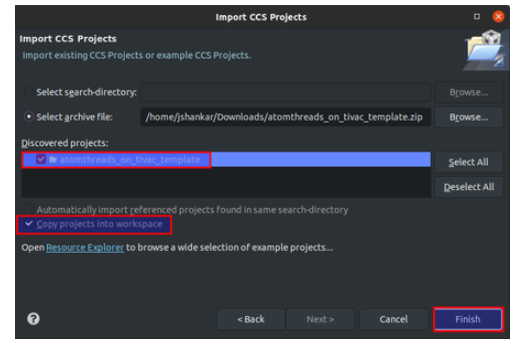
► In the Import CCS Projects Dialog window, choose Select archive file:, and Browse to atomthreads_on_tivac_template.zip file.
► Make sure Copy projects into workspace button is checked!
► Click on the Finish button.
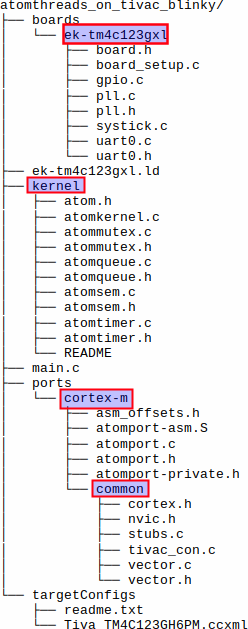
► Rename the Project as atomthreads_on_tivac_blinky
► Create CCS Build Variable called TIVAWARE_LOC which should link to the Tivaware folder
►Launch Serial terminal emulator (minicom, gtkterm,etc) and configure for 115200,8,1,N
► Load/debug/Run the Program In the Serial terminal window, you should see “Hello, Atomthreads OS” string is displayed. RED Led should be blinking on the Tiva Board. If you have reached this far, Congratulations!!
Recent Comments