
ABSTRACT
The aim of the lab is to recompile a custom version of the kernel on the Raspberry Pi 4 Hardware and get acquainted with the monolithic.kernel of the Raspbian OS which is a Unix like operating System. For this purpose the latest raspberry pi OS version Bookworm was used.Later the latest version was complied unto the Raspberry pi method using native compilation method. The same kernel was the used to interact with LED’s mounted on the GPIO pins of the Raspberry pi 4 hardware and a sample code was executed.
I NTRODUCTION
Raspbian OS is having a monolithic architecture, which means that the it alone defines a high level virtual space over computer hardware. A set of primitives or system calls implements all operating system such as process management, concurrency and memory management. Installation of Raspbian OS involves several steps and is mentioned in the next section. Following steps are required to control the LED’s through sysfs method, each section is further detailed in the subsequent sections.
1. Installation of Raspbian OS bullseye and setting up the network and ssh tools for kernel compilation..
2. Installing git and cloning the latest kernel from the git repository.
3. Compiling and building kernel image.
4. Replacing the existing kernel image after taking a backup and reboot the system with new kernel.
5. Use sysfs to blink three LED’s using the command prompt
6. Writing a C code to blink led’s and control its speed.
II INSTALLATION OF R ASPBIAN OS ON R ASPBERRY P I 4 M ODEL B
1. Install Raspberry pi Imager for windows its a tool to easily burn an OS image to an SD card. A 32GB SD card with UHC
Class 10 is preferred.
2. Open RPi imager and through the OS menu download the latest version of Raspbian OS. Give an appropriate identifiable
name to the local host and to ssh username and password. enable SSH. This is shown in figure 1 and figure 2
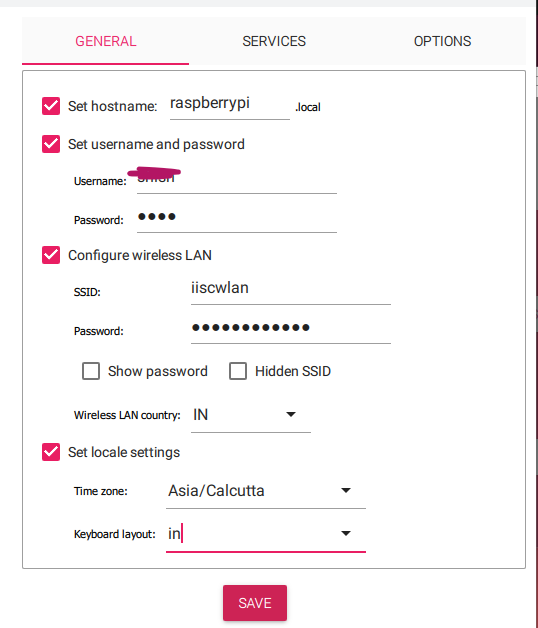
Figure 1: Raspbian Configuration during installation Set keyboard as US
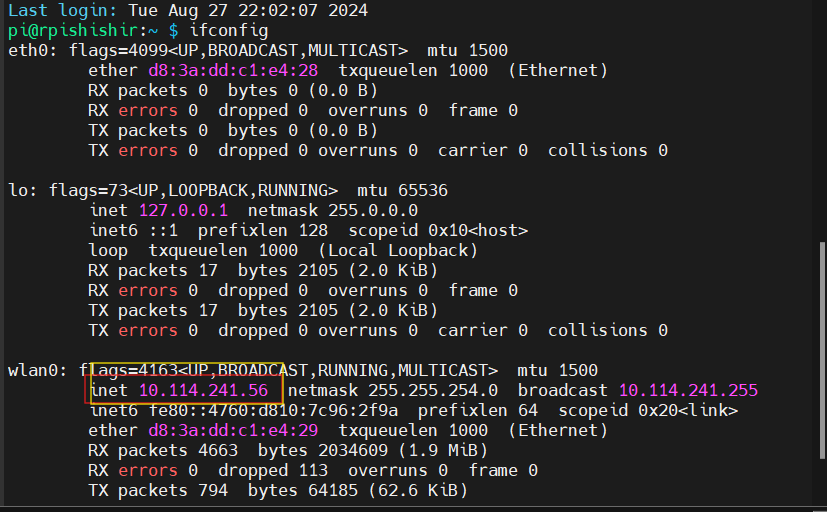
Figure 3: IP address from MobaXterm
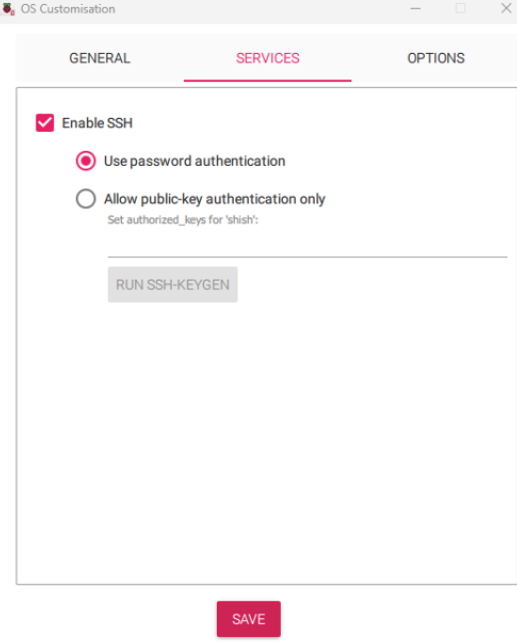
Figure 2: Enabling SSH
4. In the WIFI menu give SSID and password to the wireless LAN. First connect to a local network before connecting to IISc
WLAN.
5. Enable VNC server. This will make accessing Raspberry pi easier. Burn the disk image to SD card and insert in raspberry
pi 4. Boot the Raspberry pi hardware
6. Connect to the network and in the same network run mobaxterm with the name of the host given earlier and start anew SSH connection.Advanced IP scanner can also be used for the same but Mobaxterm is preferred. Open new session and give the set hostname which was used while installing OS. Login with username and password and enter ifconfig command in the mobaxterm terminal this will give you the ipaddress required to connect to raspberry pi hardware as shown in figure 3
7. Connect to Raspberry pi using VNC viewer goto to the WLAN symbol and try connecting to “iiscwlan” by giving username
and password. Reboot the system
8. Once connected to iiscwlan repeat step 5 and access the raspberry pi through VNC viewer.
III INSTALLING GIT AND CLONING THE LATEST KERNEL
![]()

Figure 4: Installing git and required dependencies
Its important to keep – – depth=1 option or else all the branches and history of the Git hub will be cloned. The build dependencies are also installed . For further details refer:
https://www.raspberrypi.com/documentation/computers/linux_kernel.html# natively-build-a-kernel. The output of this commands is shown in the figure 5
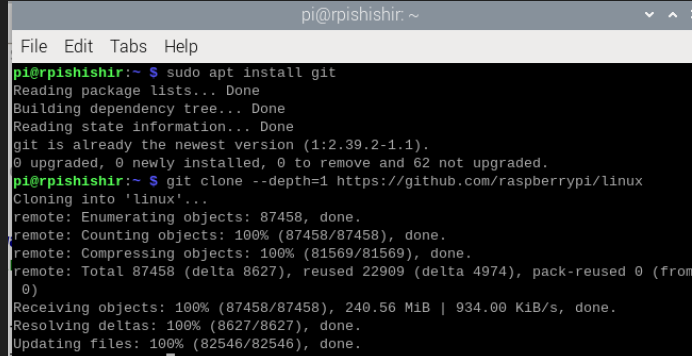
Figure 5: Results after git cloning
IV COMPILING AND BUILDING KERNEL IMAGE .
This is followed by building the kernel by applying the following commands shown in figure 6:

Figure 5: Results after git cloning
Then to install the kernel use modules install as shown in the figure 7
Figure 7: Installing the kernel modules
J6 is to make use of all the processor cores efficiently. The result after compilation will look like whats shown in figure 8
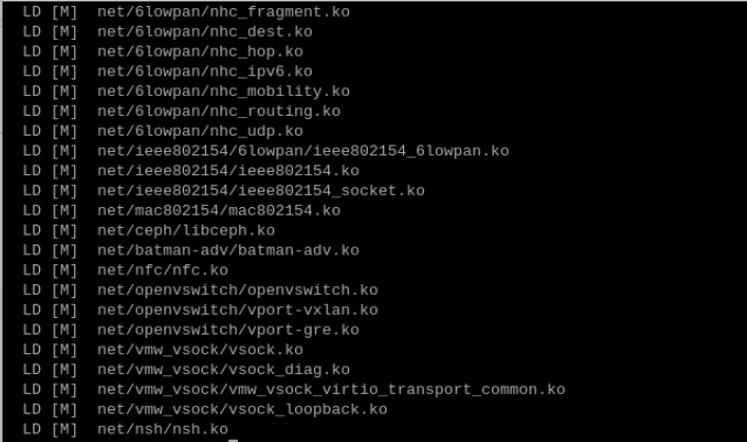
Figure 8: Kernel Compilation in progress
V REPLACING THE EXISTING KERNEL :
Create the back up of the existing kernel and copy the compiled kernel image to new kernel using the code shown in figure 9. This will replace the kernel8 with new kernel also named as kernel8.

Figure 9: Replacing kernel
VI USING SYSFS METHOD TO BLINK LED :
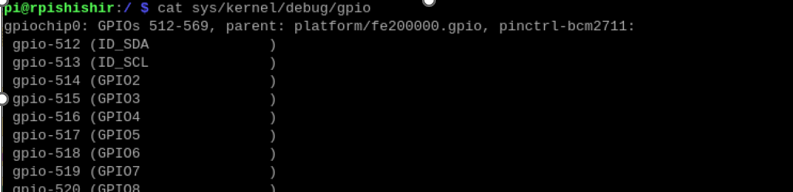
Figure 10: GPIO mapping of the Broadcom pins
Reboot the system after the new kernel is replaced. Then go to the path of gpio and find the actual gpio names, the gpio names are different then the Broadcom GPIO module but a mapping is provide. This can be seen in figure 10
using echo command a folder reference for the particular gpio can be created which can be further used turn-on and turn of the leds. this is shown in figure

Figure 11: Configuring GPIO 514
GPIO514(BCM GPIO 2), GPIO515(BCM GPIO3) and GPIO516(BCM GPIO4) are used to blink the three LEDS the code explanation is given below.
VII C CODE :
1. #include <stdio.h>
2. #include <stdlib.h>
3. #include <unistd.h>
4. #include <fcntl.h>
5. int main() {
6. int gpio514 fd, gpio515 fd, gpio516 fd;
7. char buffer[2];
8. // Export GPIO pins
9. system(“echo 514 > /sys/class/gpio/export”);
10. system(“echo 515 > /sys/class/gpio/export”);
11. system(“echo 516 > /sys/class/gpio/export”);
12. // Set direction to output
13. system(“echo out > /sys/class/gpio/gpio514/direction”);
14. system(“echo out > /sys/class/gpio/gpio515/direction”);
15. system(“echo out > /sys/class/gpio/gpio516/direction”);
16. // Open GPIO files
17. gpio514 fd = open(“/sys/class/gpio/gpio514/value”, O WRONLY);
18. gpio515 fd = open(“/sys/class/gpio/gpio515/value”, O WRONLY);
19. gpio516 fd = open(“/sys/class/gpio/gpio516/value”, O WRONLY);
20. if (gpio514 fd < 0 || gpio515 fd < 0 || gpio516 fd < 0) {
21. perror(“Error opening GPIO files”);
22. return 1;
23. }
24. // Continuous blinking loop
25. while (1) {
26. buffer[0] = ’1’;
27. write(gpio514 fd, buffer, 1);
28. write(gpio515 fd, buffer, 1);
29. write(gpio516 fd, buffer, 1);
30. usleep(500000); // 0.5 seconds on
31. buffer[0] = ’0’;
32. write(gpio514 fd, buffer, 1);
33. write(gpio515 fd, buffer, 1);
34. write(gpio516 fd, buffer, 1);
35. usleep(500000); // 0.5 seconds off
36. }
37. // Close GPIO files
38. close(gpio514 fd);
39. close(gpio515 fd);
40. close(gpio516 fd);
41. return 0;
Use gcc command to compile and run the c code. Alternatively geanny IDE can be used if its installed with the OS.
VIII CONCLUSION
1. Latest kernel is compiled with native compilation method
2. LED control is achieved by sysfs method.
Recent Comments