

The Dragon’s Lair
Dragonboot Git Code Repository
Introduction
Software which comes shipped along with an embedded system can be :
• Replaced / “upgraded” by a clever hacker to run his / her piece of software.
• Reverse-engineered if the file falls into an unknown third party’s hands.
This could spoil the manufacturer’s business or even pose a serious safety hazard (if somebody succeeds in downloading a malicious piece of code onto the embedded system).
Therefore, there’s a need to ensure that :
• Software updates done to the system are done only by a trusted party (by authentication of the user).
• Software files can’t be reverse-engineered by an unknown third party ( by encrypting the software).
What is DragonBoot ?
DragonBoot is a secure bootloader which allows software updates to happen only through a 2-step process of :
• Decrypting the software binary & calculating an SHA256 hash
• Verifying the authenticity of the user by performing verification of the digitally signed embedded SHA256 hash which is included with the binary & comparing the same with the computed value in the previous step
Authentication ensures that we’re able to verify the identity of the sending party before attempting to upgrade the system. So only the intended party (i.e. the manufacturer) can upgrade the system. This is accomplished by implementing the idea of a digital signature.
Supplying the software binary in encrypted form ensures that nobody else can make sense out of it / reverse-engineer the same if it falls into their hands. Only the bootloader has the key to decrypt the encrypted software binary.
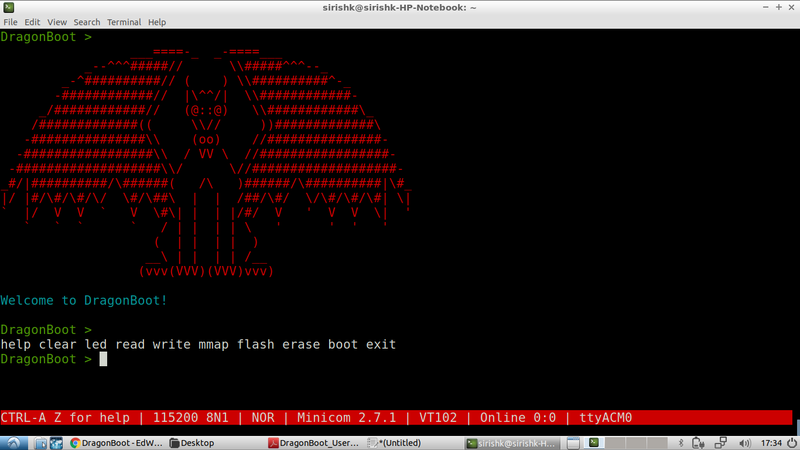
Features
• Interactive shell (thanks to the Microrl library by Helius) with command auto-complete feature (via TAB key).
• File transfer via XMODEM protocol (thanks to Georges Menie). Minicom has native support for file transfer via XMODEM and can be used off-the-shelf.
• Wide range of cryptographic functions (RSA, AES, Elliptic Curve etc.) supported thanks to the microcontroller-friendly BearSSL library developed by Thomas Pornin.
• Software ring-buffer for asynchronous storage of high-speed UART data thanks to Anders Kalør.
• Low memory footprint (roughly 65Kbytes after stripping headers), making this bootloader an attractive option for memory constrained microcontrollers !
Design & Implementation
Secure upgrade process
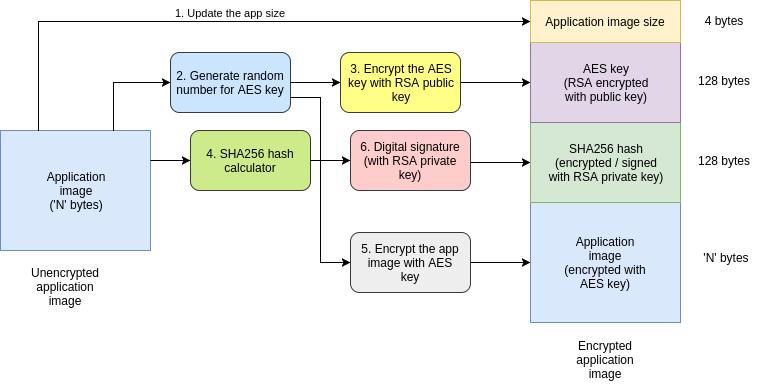
The first step in the secure upgrade process, as depicted in the above diagram is to generate an encrypted version of the application which would be used for software upgrade. The below steps need to be followed for the same :
1. Take the input application binary (stripped off all headers & debug info).
2. Create a new binary, update its header with the actual size of the application.
3. Generate a random number for use as a 128-bit AES key,
4. Encrypt the AES key using an RSA public key and store it in the final application’s header.
5. Calculate SHA256 hash of the application binary (used for integrity check later by the DragonBoot bootloader after receiving the same).
6. Encrypt the application using the AES key generated earlier.
7. Digitally sign the SHA256 hash value (using a different RSA key – private version) computed earlier and store it in the header. This is used for authentication later by DragonBoot.
Once the encrypted binary has been transferred to DragonBoot via UART, the following steps are followed by the bootloader to decrypt & authenticate the image before storing it in flash :
1. Decrypt the AES key by using the RSA private key counterpart of the public key used for encryption at the source earlier.
2. Use this AES key to decrypt the application binary.
3. Compute the SHA256 hash of the decrypted binary.
4. Perform signature validation of the signed SHA256 hash sent by the source (by using the RSA public key counterpart).
5. Next, compare the transmitted hash value against the computed value to verify that the image has not been tampered and to confirm that the authorized entity has sent the application image. So the hash & digital signature serves a dual purpose of integrity check as well as authentication.
Memory map & boot sequence
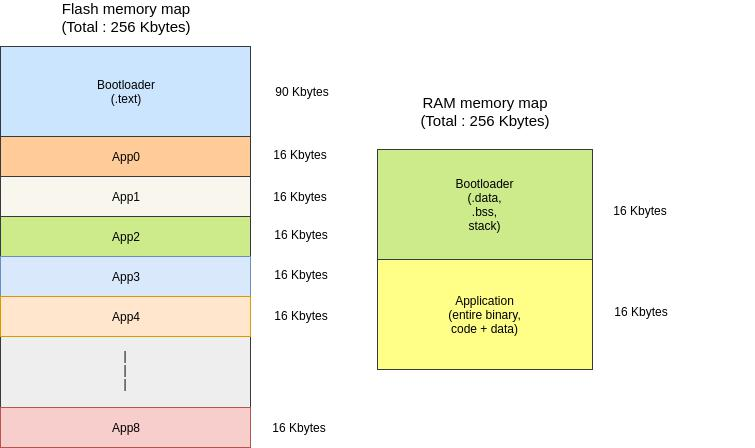
• The memory map is depicted on the figure to the left.
• The flash memory has been divided into 9 equal sized partitions, 1 for storing each application. 90 KBytes has been reserved for the bootloader code area; which is a super-conservative estimate.
• RAM, 32 KBytes total has been divided equally between the bootloader & application.
• The memory layout as depicted on the previous page is a super-conservative layout, only used for demonstration purposes. The application to be booted up is stored initially in one of the partitions designed for it in the flash memory.
Application boot sequence :
• Copy the decrypted application from flash to RAM location 0x20004000 (16K from start of RAM address 0x20000000).
• Change the NVIC vector table base address to 0x20004000 (which is the starting address of the application where the ARM Vector table is stored).
• Load the Stack pointer with 4 bytes from memory address [0x20004000].
• Load the Program Counter with 4 bytes from memory address [0x20004004] to boot up the application.
DragonBoot in Action !
![]()
First, we invoke the “flash” command followed by the partition where we wish to store the application. As one can see, the bootloader waits for the user to start file transfer via XMODEM protocol.
![]()
After this, a file transfer is setup via minicom “Send file / xmodem” menu option & the encrypted version of the application that we’d created earlier is selected for transfer. The image depicts file transfer in progress.
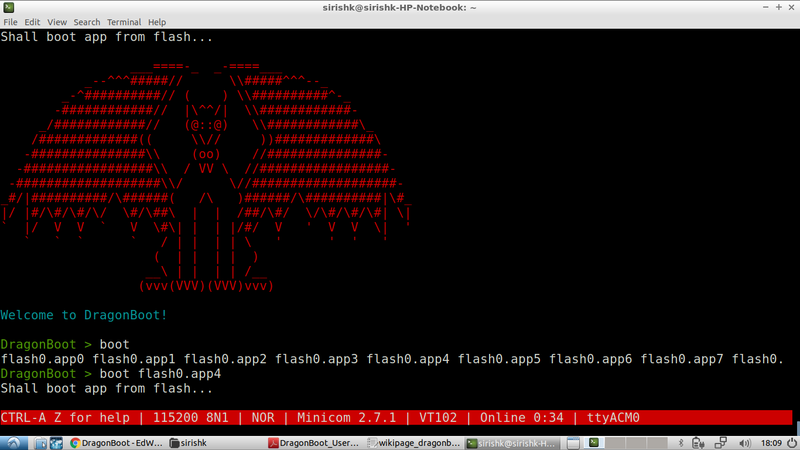
Finally, we boot the flashed application binary by using the “boot” command followed by the name of the partition from which we wish to run an application.
Further details
For further details, you may access the below document :
DragonBoot User & Developer’s Guide
For source code, you may visit the following page :
For instructions on how to build & test the software :
Cheers, have fun !
Recent Comments