
Introduction
This project aims to look into the aspect of reading and writing to a file in a FAT16/FAT32 memory system.
Hardware and Software Resources Used
- STM32L Development Board based on the ARM Cortex-M3 processor.
- Hex Editor Software to view the contents on SD card.
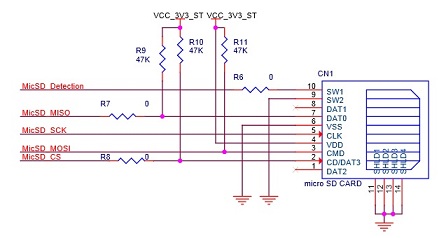
Interfacing Board with SD card
The pin connection for the SD card board is as shown in the figure.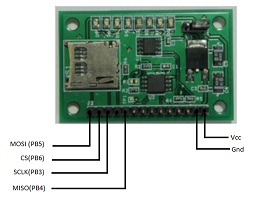
The pin connection of stm32 discovery board is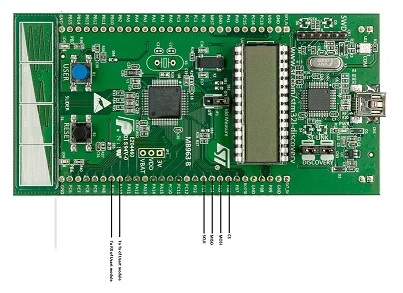
The pin connection of UART module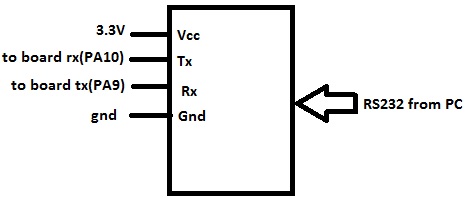
Software Block diagram
The overall block diagram of the software part is as shown.Our project consist of the first two layer of the block diagram.
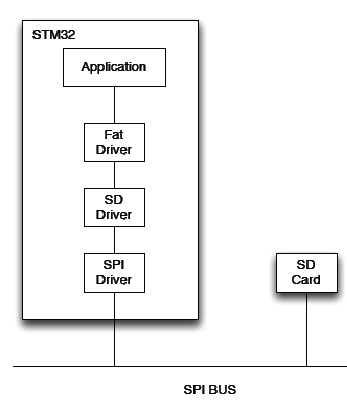
SPI driver consist of following function
1.spi_init()-For initialization.
2.spidata(uint16_t d)-For reading and writing.
SD card Driver
SD card driver consist of following function
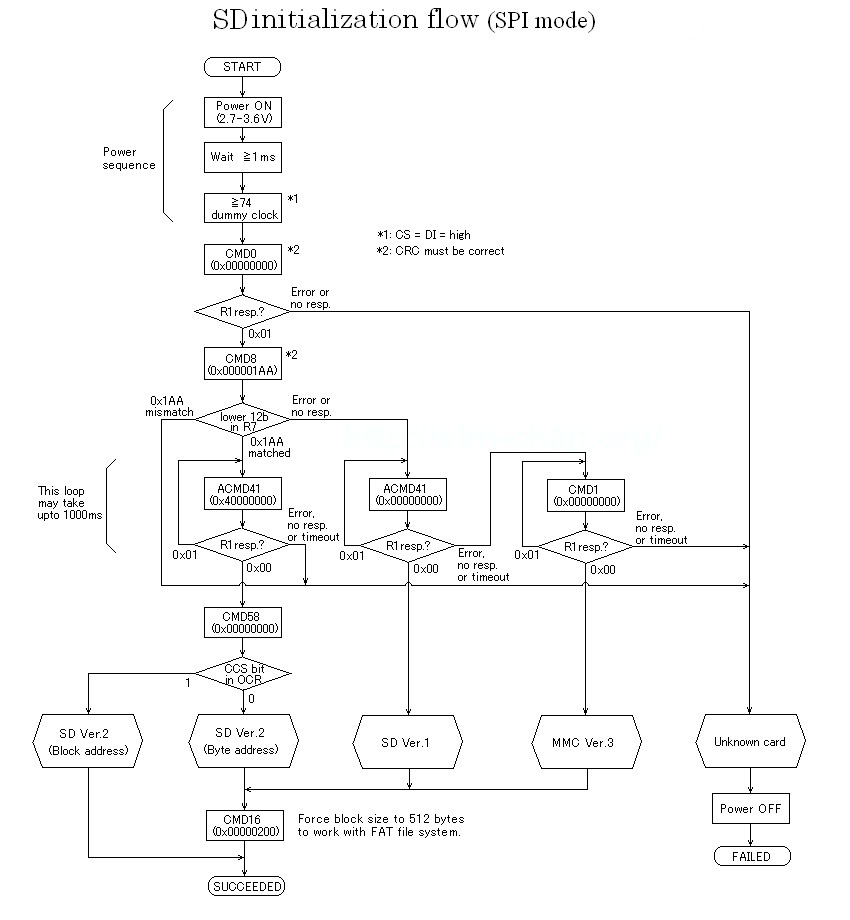
1.sd_init()- This is for initialization of SD card to work in SPI mode at a particular speed. The flow chart is as shown
2.sd_readsector(uint32_t sector_no, uint8_t *buf1)- For reading a sector into the buffer(buf).
3.sd_writesector( uint32_t sector_no, const uint8_t *buf) – For writing the contents of buffer to a particular sector given by sector no.
There are few more function to see whether the response R1, R2, R3 given by the SD card are proper or not.
Reading and writing a file on sd card
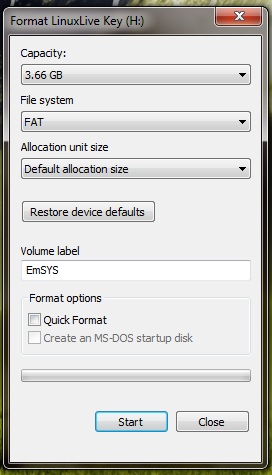
1>Format the disk using FAT16
This involves the creation of a valid boot-sector in the microSD and over-writing all other locations with ‘0’s (or ‘1’s). The formatting process creates a sector (Ideally, Sector 0) with the appropriate settings that stores information like ‘sector size’, ‘no of FAT s’ etc. We use a sector size of 512 bytes along with 2 FATs (both are copies of each other).
Plug in the micro SD into an adapter or an appropriate dongle (photon+, micromax etc) and plug in the device to your PC. Wait for your PC to detect the SD card. Now format the SD card (use the default FAT settings on Windows or the ‘disk utility’ on Ubuntu. Also note that it is better to disable the ‘Quick Format‘ option on Windows and click on the overwrite everything with ‘0’s option on Disk Utility as these can create problems when the project in carried out over and over again).
2>Reading from a file
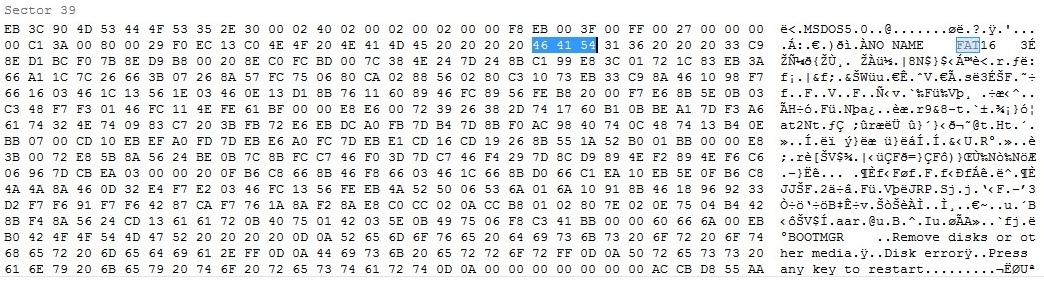
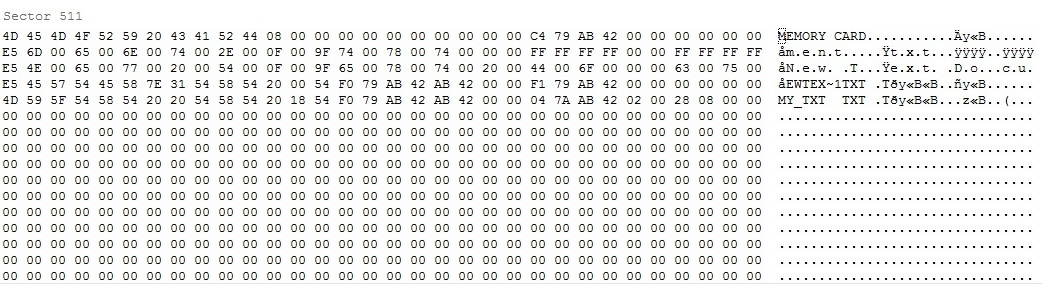
This involves creating a file, finding the sectors containing the contents of the file and finally reading the necessary sectors. After formatting the microSD create a file named ‘my_file.txt’. Any type of file( jpegs mpegs) can be created. We choose the ‘.txt’ file owing to its simplicity in editing it. In addition changes in text files can be viewed easily in both Hex Editors and the GTKTerm hyperterminal. The name of the file will be written in FAT table as shown.
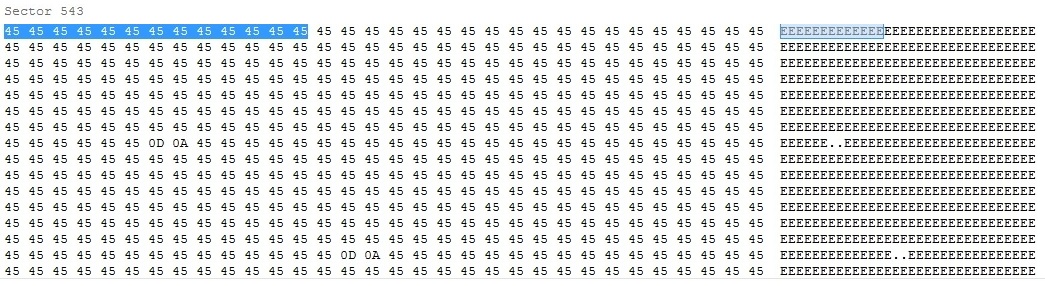
Open the file and edit it as shown – (Any random characters can be typed in as long as the pattern can be remembered easily). Now open the image of the microSD using the HxD Hex Editor. Find the sequence of characters in the file (Ctrl+F and type ‘EEEEEE’ and press Enter). Note the sector number where the sequence of characters begin.
Plug out the SD card from the adapter/dongle and plug it into the slot on the storage board.Now use the ‘sd_readsector’ function with the first input parameter as the sector number noted earlier and the second parameter as the string buffer which stores the sequence. This string buffer must be of a size greater than or equal to the no of characters in the file/sector.Save and Run the code and open the ‘gtkterm’ interface to view the characters being read. The sequence shown on the gtkterm must be the same as the sequence written to the file earlier. Note that the procedure to find the location of the contents of the file was done manually using the hex editor. This can be automated if the File Allocation table can be found and the file-name can be found in it.
2>Writing to a file
Using the same sector number used in the earlier read process the file ‘my_file.txt’ can be written to using the ‘sd_write’ function. The first parameter of the ‘sd_write’ function is the sector number and the second parameter is the string that is to be written to the file.
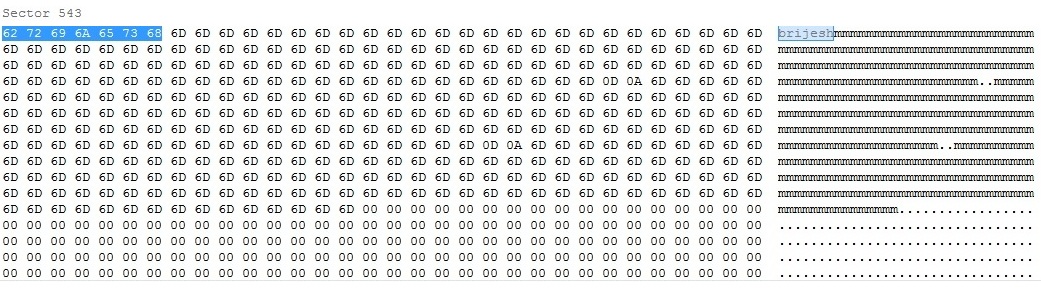
Save and Run the code. Keep the ‘gtkterm’ open to confirm that the correct string was written to the sector. The write process in now complete. Now plug out the memory card and insert it into the adapter/dongle and plug it into your PC. Open the file ‘my_file.txt’ on any editor. Note that the previous sequence was replaced by the new sequence in your code.As shown
Future Work
Fat file system can be set up on the SD card. Using open source library for fat file system data can be read and write .Details of the library is given in the reference section.
References
1.[1] Open source library for further development
2. STM32L1 discovery kits: STM32L-DISCOVERY and 32L152CDISCOVERY
Project Team Members
Prashanth Nayak (09433) prashanthspit@gmail.com
Brijesh P Reddy (09305) brijesh.ichigo17@gmail.com
Recent Comments